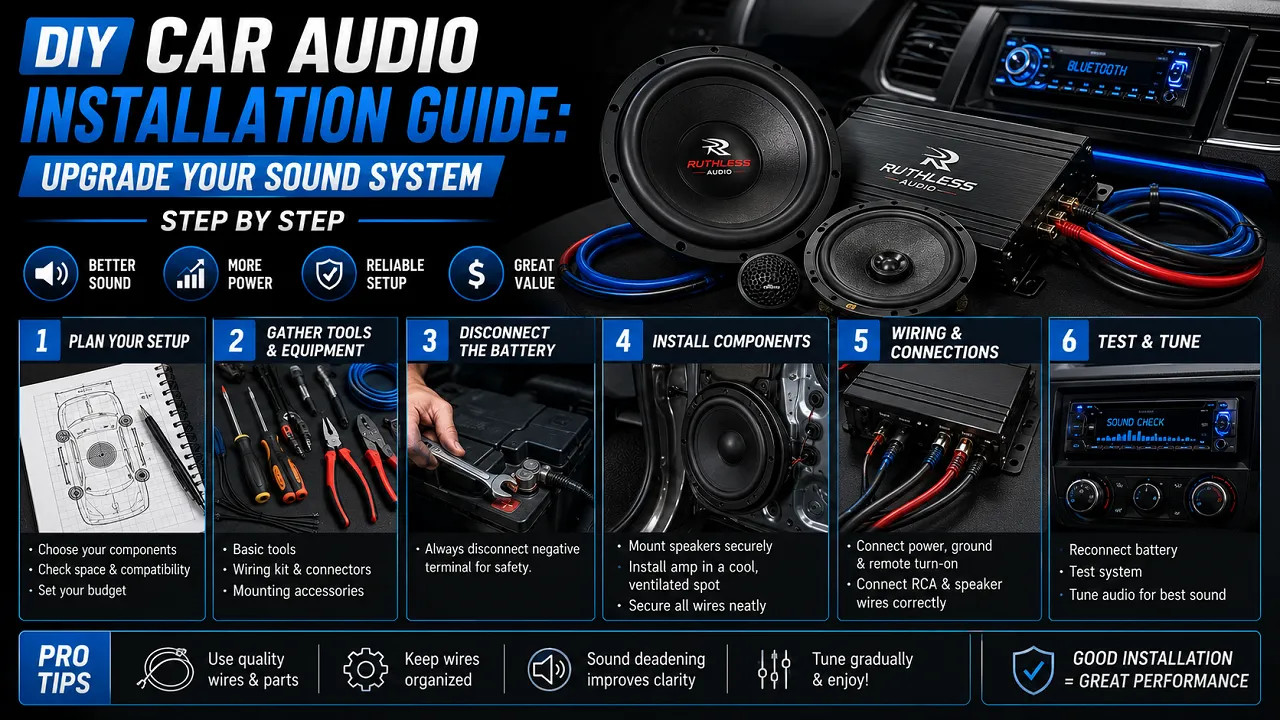
DIY Car Audio Installation Guide: Upgrade Your Sound System Step by Step
A successful DIY Car Audio Installation is one of the most rewarding ways to improve your Car Audio System without spending extra money on professional labor. Whether you’re planning a complete Car Audio Upgrade, replacing factory speakers, or installing a new Car Sound System, understanding the installation process will help you achieve better sound quality and reliable performance. With the right tools, careful planning, and proper Car Audio Installation techniques, you can confidently transform your vehicle’s audio experience.
Installing a car audio system may seem complicated at first, but breaking the project into simple steps makes the process much easier. Proper preparation is the key to avoiding mistakes and ensuring every component works together perfectly.
Prepare Before You Begin
Before purchasing any equipment, take time to research your vehicle’s audio specifications. Different cars require different speaker sizes, mounting brackets, and wiring adapters.
Start by checking:
- Your vehicle owner’s manual
- Factory speaker sizes
- Head unit compatibility
- Available installation space
- Wiring harness requirements
Measuring the mounting depth and speaker openings beforehand helps prevent installation problems later.
If you’re planning a larger Car Audio Upgrade, also consider future additions like amplifiers or subwoofers while designing your system.
Gather the Required Tools and Equipment
Having the proper tools ready before starting will make the installation much smoother.
Common tools you’ll need include:
- New head unit
- Car speakers
- Amplifier (optional)
- Wiring harness adapter
- Wire cutters and strippers
- Electrical tape or heat shrink tubing
- Crimp connectors
- Screwdrivers
- Socket wrench set
- Panel removal tools
- Drill (if required)
- Digital multimeter
Using quality installation accessories helps improve reliability and creates a cleaner finish.
Disconnect the Vehicle Battery
Safety should always be your first priority.
Before touching any electrical wiring, disconnect the negative battery terminal to prevent:
- Electrical shorts
- Blown fuses
- Damage to electronic components
- Accidental airbag activation
Never begin a car audio installation while the battery is connected.
Remove the Factory Audio Components
Once the battery is disconnected, carefully remove the dashboard panels using plastic trim removal tools.
Next, remove:
Factory Head Unit
Disconnect all factory wiring and antenna connections while noting their original positions.
Factory Speakers
Remove each speaker carefully and inspect the factory wiring for damage before connecting your new speakers.
Keeping screws and mounting clips organized makes reassembly much easier.
Install the New Head Unit
Your new head unit serves as the control center of your entire audio system.
Connect the wiring harness adapter by matching each wire correctly according to the manufacturer’s wiring diagram.
Before securing the head unit permanently:
- Verify all wiring connections
- Connect the antenna
- Check Bluetooth and USB connections
- Confirm the unit powers on correctly
A proper wiring harness simplifies installation while avoiding the need to cut factory wiring.
Install the New Car Speakers
Replacing factory speakers is one of the easiest ways to improve sound quality.
When installing new speakers:
- Confirm speaker polarity (+ and -)
- Secure each speaker firmly
- Avoid pinching wires behind door panels
- Use speaker adapters if necessary
Correct speaker placement and secure mounting help eliminate unwanted vibrations.
Install an Amplifier (Optional)
Adding an amplifier significantly improves speaker performance by providing clean, consistent power.
Choose a mounting location that offers:
- Good ventilation
- Easy access
- Protection from moisture
- Secure mounting points
Run the power cable directly from the battery using the correct fuse, and keep power and RCA cables separated to reduce electrical noise.
Check All Wiring Connections
Before reinstalling interior panels, inspect every connection carefully.
Verify:
- Power wiring
- Ground connection
- Speaker wiring
- RCA cables
- Remote turn-on wire
- Fuse installation
A poor ground connection is one of the most common causes of amplifier noise and performance issues.
Test the Entire Car Audio System
Reconnect the battery and power on the system before reassembling your vehicle.
Check every component individually.
Make sure:
- All speakers are working
- Audio is balanced
- No distortion is present
- Bluetooth connects properly
- Radio reception is clear
- Amplifier powers on correctly
If something doesn’t work as expected, use a multimeter to troubleshoot the wiring before continuing.
Reassemble the Interior
Once you’re satisfied with the performance, reinstall all dashboard panels, door trims, and interior components.
Take your time during this step to ensure:
- Panels fit securely
- No wires are exposed
- Clips are fully seated
- Nothing rattles while driving
A clean installation looks professional and protects your equipment for years to come.
Tips for a Successful DIY Car Audio Installation
Following a few best practices can improve both installation quality and long-term reliability.
Label Every Wire
Marking each wire before disconnecting it makes reinstallation much easier.
Use Quality Wiring
Premium wiring improves electrical efficiency and reduces signal loss.
Keep Wiring Organized
Secure loose wires with zip ties to prevent rattling and accidental damage.
Upgrade Gradually
If you’re working within a budget, begin with speakers or a head unit and expand your system later by adding amplifiers or subwoofers.
Common DIY Installation Mistakes to Avoid
Many first-time installers encounter similar problems.
Avoid these common mistakes:
- Skipping battery disconnection
- Incorrect speaker polarity
- Poor grounding
- Using undersized power cables
- Forgetting fuse protection
- Loose wiring connections
- Mounting amplifiers without ventilation
Taking extra time during installation helps prevent costly repairs later.
Completing a DIY Car Audio Installation is an excellent way to improve your Car Audio System while learning valuable installation skills. By preparing properly, using quality components, and following each step carefully, you can enjoy a successful Car Audio Upgrade that delivers better clarity, stronger bass, and a more enjoyable driving experience. Whether you’re replacing speakers, installing a new head unit, or building a complete Car Sound System, careful planning and attention to detail will help you achieve professional-quality results.
Frequently Asked Questions (FAQs)
1. Can I install a car audio system myself?
Yes. With the proper tools, wiring diagrams, and patience, many car owners can successfully complete a DIY car audio installation.
2. What tools do I need for a DIY car audio installation?
Basic tools include screwdrivers, wire strippers, panel removal tools, electrical tape, a multimeter, crimp connectors, and a socket set.
3. Should I disconnect the battery before installing car audio equipment?
Absolutely. Disconnecting the battery helps prevent electrical shorts, damaged components, and accidental injuries during installation.
4. Do I need an amplifier when upgrading my speakers?
Not always. Many aftermarket speakers work with factory head units, but adding an amplifier provides cleaner power and significantly improves sound quality.
5. How long does a DIY car audio installation take?
A simple speaker or head unit replacement usually takes 2–4 hours, while a complete audio system with amplifiers and subwoofers may require a full day or more.
6. What is the biggest mistake during car audio installation?
Incorrect wiring, poor grounding, and improper fuse installation are among the most common mistakes that can affect system performance and reliability.